Nov 25, 2025
Hydraulic quick couplers are subjected to high pressure, shock, and vibration over long periods of use, which can lead to issues such as medium leakage, deformation, insufficient pressure, poor connection, or even failure to connect. Therefore, timely replacement is an essential safety measure.
Replacing a hydraulic coupling inevitably involves disconnecting and connecting, and both steps are critical. The following is the detailed operating procedure:
Shut down the system and ensure the hydraulic machinery or equipment is turned off.
Release system pressure completely via the vent valve or pressure relief valve to prevent oil spray and accidents.
Gather necessary tools: wrenches, clean cloths, protective gloves, O-rings, and lubricant if needed.
Pull back the locking sleeve on the female coupler.
Carefully remove the male nipple from the female half.
If the coupler is stuck, make sure all residual pressure has been released and gently apply a small amount of lubricant to the sleeve.
Clean the connecting ends and check for any damage or debris.
Check the male and female ends for scratches, dents, or wear.
Inspect O-rings or sealing elements and replace them if damaged or aged.
Ensure the replacement coupler matches the pressure rating, size, thread type, and structural type of the system.
Apply a small amount of compatible hydraulic oil or lubricant on the sealing surfaces or O-rings.
Insert the male nipple into the female coupler.
Release the sleeve or locking mechanism so it locks securely.
Ensure the connection is tight and properly aligned, without forcing the parts.
Slowly pressurize the system and monitor the coupler for leaks.
Operate the system briefly to check for proper flow and sealing.
If any leakage or misalignment is observed, depressurize again and adjust or reinstall.
Always replace worn or damaged O-rings when changing couplers.
Avoid cross-threading or forcing connections.
Keep the unused coupler protected with dust caps to maintain cleanliness.
Document the replacement date for future maintenance records.
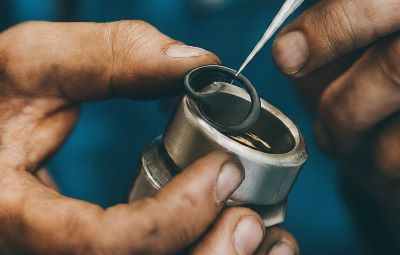
Removing the connection without damaging the coupling is crucial. The following are the specific steps:
Turn off the hydraulic system completely.
Release all system pressure using the vent valve or pressure relief valve; residual pressure can cause oil to spray and pose a safety hazard.
Wear protective gloves and goggles to prevent injury from oil spray.
Clean the exterior of the coupler to remove dirt, dust, or debris that could fall into the hydraulic system.
Inspect the locking sleeve and ensure it moves freely.
For standard ball-lock or push-to-connect couplers:
Pull back the locking sleeve on the female coupler.
Carefully pull out the male nipple while keeping alignment straight.
For threaded-locking couplers:
Use a wrench to unscrew the coupler slowly.
Remove the male and female halves.
Place a clean container or cloth under the coupler to catch any remaining hydraulic oil.
Avoid spilling oil on equipment or floor to prevent slips and contamination.
Check both male and female ends for scratches, wear, or damage.
Replace any worn O-rings or seals if planning to reuse the coupler.
Cover the disconnected ends with dust caps to keep them clean until the next connection.
Never attempt to disconnect a coupler while the system is pressurized.
Avoid twisting or forcing the coupler out, which can damage seals or locking mechanisms.
Keep the workspace clean to prevent dirt entering the hydraulic system.
Besides proper use, the maintenance of hydraulic couplings in daily applications is also very important, and can be mainly carried out in the following aspects:
Regular Inspection
Regularly check hydraulic couplings for looseness, wear, cracks, or deformation to identify potential issues in a timely manner.
Leakage Inspection
Monitor the coupling area for oil seepage, oil stains, or abnormal pressure. If leakage is detected, take immediate action by replacing seals or the coupling as needed.
Maintain Cleanliness
During installation, disassembly, and operation, keep the coupling and surrounding area clean to prevent dust or contaminants from entering the hydraulic system.
Seal Maintenance
Regularly inspect seals for aging or wear and replace them promptly when necessary to ensure proper sealing performance.
Protective Measures
When not in use, couplings should be fitted with dust caps or protective covers to prevent contamination and mechanical damage.
If you would like to learn more about how to use hydraulic quick couplings to increase their service life and lifespan, please read this article for more information.Fokca manufactures a variety of hydraulic couplings; please contact us if you have any needs,or visit our company website.
You May Interest In
Nov 26, 2025 Blog
How to use hydraulic quick coupler?
Nov 23, 2025 Blog
How to identify hydraulic quick coupler?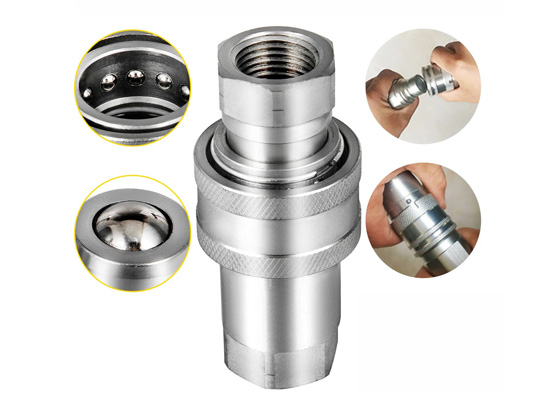
Sep 01, 2025 Blog
A Guide to 6 Common Hydraulic Quick Coupler ProblemsLinks: www.fescolo.com(Pneumatic)
FOKCA ©1998-2025 All Rights Reserved Sitemap